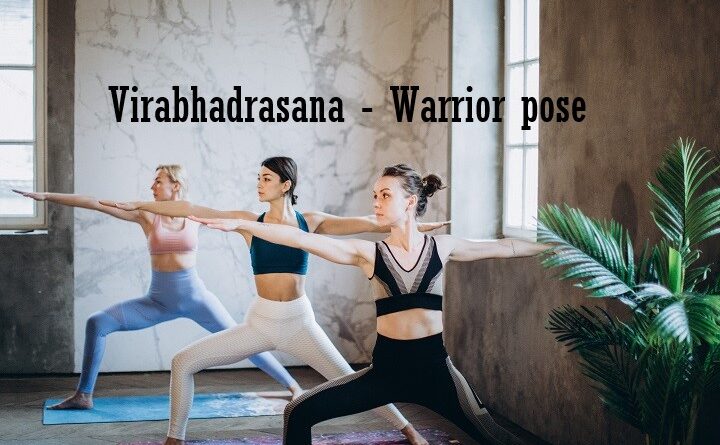
Virabhadrasana – Warrior pose |Beginner’s Yoga Pose|
Pose meaning
Warrior Pose or Virabhadrasana (Veer-aa-ba-DRA-SUN-aa) — is a powerful posture that builds strength in the arms, shoulders, thighs, and back muscles. The pose is named after Virabhadra, a fierce warrior who is the incarnation of Lord Shiva. The pose gets its name from the Sanskrit words Vira, meaning warrior, bhadra, meaning good or auspicious, and asana, meaning pose.
In other words Virabhadrasana or Warrior Pose is a group of related lunging standing asanas in modern yoga as exercise commemorating the exploits of a mythical warrior, Virabhadra.
Origin
Ancient cave rock sculptures in the Ellora Caves, specifically cave 16 and cave 29, show a warrior-Shiva figure in a pose somewhat resembling Virabhadrāsana while conquering demons or wooing his consort Parvati. Still, these poses are not attested in the hatha yoga tradition until the 20th century with the practices of Tirumalai Krishnamacharya and his student Pattabhi Jois, who was photographed in Warrior I in about 1939.
Poses close to Virabhadrasana were described independently of yoga in a European source early in the 20th century, namely in Niels Bukh’s 1924 Danish text Grundgymnastik eller primitiv gymnastik (known in English as Primary Gymnastics).Bukh’s poses were derived from a 19th century Scandinavian tradition of gymnastics and “found their way to India” by the early 20th century.

Steps
Step 1
Stand in Tadasana (Mountain Pose). With an exhale, step or lightly jump your feet 31/2 to 4 feet apart. Raise your arms perpendicular to the floor (and parallel to each other), and reach actively through the little-finger sides of the hands toward the ceiling. Firm your scapula against your back and draw them down toward the coccyx.
Step 2
Turn your left foot in 45 to 60 degrees to the right and your right foot out 90 degrees to the right. Align the right heel with the left heel. Exhale and rotate your torso to the right, squaring the front of your pelvis as much as possible with the front edge of your mat. As the left hip point turns forward, press the head of the left femur back to ground the heel. Lengthen your coccyx toward the floor, and arch your upper torso back slightly.
Step 3
With your left heel firmly anchored to the floor, exhale and bend your right knee over the right ankle so the shin is perpendicular to the floor. More flexible students should align their right thigh parallel to the floor.
Step 4
Reach strongly through your arms, lifting the ribcage away from the pelvis. As you ground down through the back foot, feel a lift that runs up the back leg, across the belly and chest, and up into the arms. If possible, bring the palms together. Spread the palms against each other and reach a little higher through the pinky-sides of the hands.
Keep your head in a neutral position, gazing forward, or tilt it back and look up at your thumbs.
Step 5
Stay for 30 seconds to a minute. To come up, inhale, press the back heel firmly into the floor and reach up through the arms, straightening the right knee. Turn the feet forward and release the arms with an exhalation, or keep them extended upward for more challenge. Take a few breaths, then turn the feet to the left and repeat for the same length. When you’re finished return to Tadasana.
Benefits
- Strengthens your shoulders, arms, legs, ankles and back
- Opens yours hips, chest and lungs
- Improves focus, balance and stability
- Encourages good circulation and respiration
- Stretches your arms, legs, shoulders, neck, belly, groins and ankles
- Energizes the entire body
Tips
- Beginner’s: When the front knee bends into the pose, beginners have a tendency to tip the pelvis forward, which duck-tails the coccyx and compresses the lower back. As you perform step 2 in the main description above, be sure to lift the pubis toward the navel and lengthen the tail toward the floor. Then as you bend the knee, continue to lift and descend these two bones, keeping the top rim of the pelvis relatively parallel to the floor.
- Beginners find it very difficult to keep the back heel grounded and the lower back lengthened in this pose. As a short-term solution, raise the back heel on a sand bag or other height.
- Partnering: Here’s a partnering exercise for this pose, but you need two partners (of approximately the same height) and a thick pole (like a broomstick). As you perform the pose, have your partners stand, facing you, to either side of your torso. It’s helpful if you and your partners are similar in height. They should hold the ends of the pole and hold it above your head. Grasp the pole with your raised hands, then you and your partners push the pole up until your arms are fully extended. Imagine then, as all three of you push, that your torso and legs are “hanging” from the pole.
Contraindications of the Warrior Pose (Veerabhadrasana)
- Practice Warrior Pose (Veerabhadrasana) only after consulting your doctor if you have experienced spinal disorders recently or just recovered from a chronic illness.
- High blood pressure patients should avoid this posture.
- Veerabhadrasana especially benefits pregnant ladies in their second and third trimester provided they have been practicing yoga regularly. Practice Virabhadrasana while standing close to a wall so you can support yourself if required.
- However do consult your doctor before doing this yoga posture.
- Avoid this posture if you are suffering or had recently suffered from diarrhea.
- If you have knee pain or arthritis, use some support at the knee to hold this yoga posture.
Inner peace begins the moment you choose not to allow another person or event to control your emotions.” ― Kathryn Budig